GitHub Token
Intro
Because GitHub.com is where all specifications live, it is essential to have good access to it. This goes under the hood through the GitHub API (Application Programming Interface). You have access to this, but soon you run into a limit. To make more requests, you need a token. Here's how to get such a token and how to apply it.
Steps to take:
- Get the token
- Use the token server-side
- Use the token client-side
Use the token server-side
Make a copy of the file .env.example and name it .env. Enter the token in it.
Use the token client-side
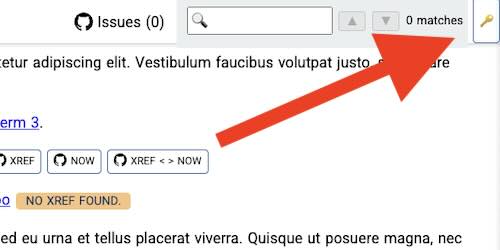
At the top right of the screen, you will see a button with a key. Click it, and an input field will appear. Enter the token here and confirm.
Get the token
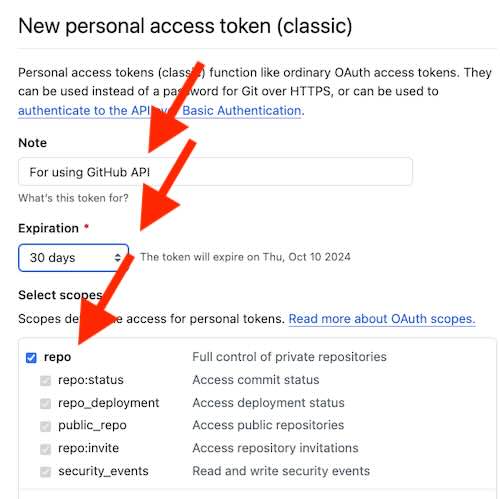
To obtain a Personal Access Token (PAT) for the GitHub API, follow these steps:
- Log in to GitHub: Go to GitHub and log in to your account.
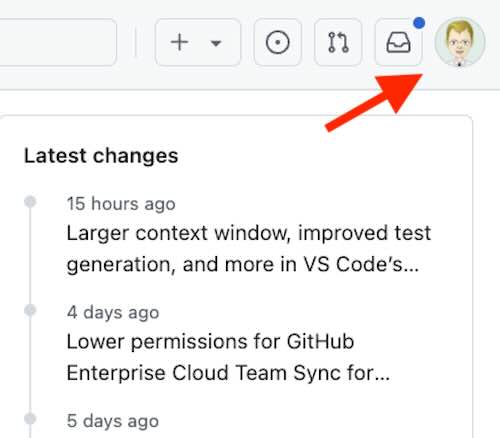
- Navigate to Settings:
- Click on your profile picture in the upper-right corner.
- Select "Settings" from the dropdown menu.
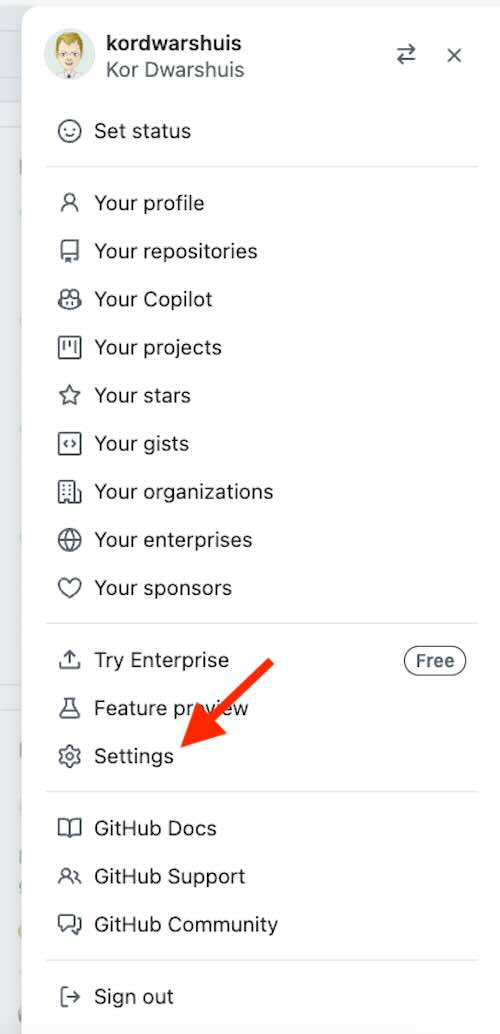
- Access Developer Settings:
- In the left sidebar, scroll down and click on "Developer settings".

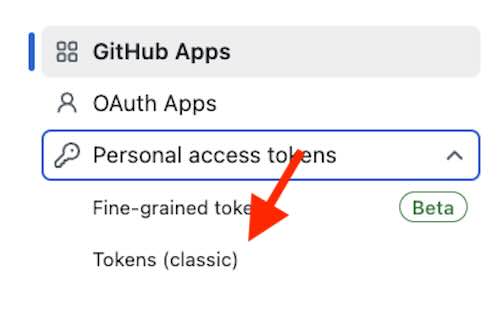
- Generate a New Token:
- Click on "Personal access tokens".


- Click on "Generate new token".
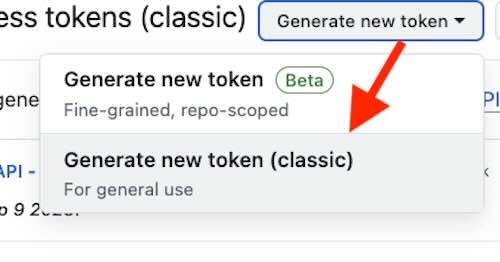
- Configure the Token:
- Give your token a descriptive name.
- Select the “repo” scope.
- Click "Generate token" at the bottom of the page.
- Copy the Token:
- Copy the generated token and store it securely. You won't be able to see it again once you leave the page.
- Apply the token:
- Paste the token in the
.envfile of your Spec-Up-T installation or click on the button with the key symbol (top right) of your specification website.
- Paste the token in the

The token will now be used when making requests to the GitHub API.